Pages

Thursday, January 31, 2013

Jeera rice

Ingredients
Basmati rice-1cup
Cumin Seeds-1teaspoon
Copped Onion (optional) - 2 tablespoons
Oil - 1teaspoon
Ghee - 2teaspoons
Salt

Method

Wash and soak the rice for half an hour.
Heat oil in a pressure pan/ cooker and add in the cumin seeds, let them splutter.
Add the onions with salt and fry till they becomes shiny.
Drain the rice from the soaked water, add it to the cooker and fry for a minutes.
Add 11/2 cups of water, close the pressure cooker, cook on medium heat for 7 minutes. Remove the cooker from the stove, even if the cooker doesn't give the whistle sound. Let the cooker cool completely.
Open the cooker, fluff the rice gently with a fork. Finally add the ghee, and toss the rice well.
Aromatic jeera rice is ready. Enjoy it with dal or your favourite veggie side dish.

Note: the water measurement for basmati rice is 1 cup rice : 11/2cups of water. But this may vary according to the quality of the rice you are using. Keep it in mind that 11/2cups is the maximum amount of water you are adding, otherwise the grains won't be separate.
If you are making it in a large quantity, just wait till the cooker gives one whistle and remove it from flame.

Tuesday, January 29, 2013

Murungai kai poriyal/ Drumstick Stirfry

During my last trip to India, I had a chance of enjoying fresh drumstick at least twice a week. On top of it, my mother-in-law went to her native, and came back with a good load of fresh drumstick leaves and drumsticks. Of course, drumstick  is a king for sambar, but it would start boring after some time. Hence I prepared this poriyal one day. Its actually a quick and simple dish and tastes heavenly if you are using fresh and tender drumsticks.

Ingredients
Fresh Drumsticks -3
Shallots - 12
Curry powder- 11/2teaspoon
Turmeric powder-1/8teaspoon
Mustard seeds-1/2teaspoon
Channa dal & Urad dal - 1 teaspoon each
Grated coconut - 1tablespoon
Salt

Method 
Wash and cut the drumstick into 3" pieces. Chop the shallots.
Heat oil in a pan, make the tempering with mustard seeds, channa & urad dals. Add in the shallots, quick for a few minutes.
Then add the chopped veggie with turmeric powder and salt.
Add a cup of water and close the pan. 
  
Add the curry powder when the veggie is 3/4th done. 
Mix it well and cook till the water evaporates.
Finally add the grated coconut, mix it with the veggie and put off the flame.
Quick and tasty drumstick stir-fry is ready. Goes well with white rice/ rasam rice /curd rice.

Friday, January 25, 2013

Thakkali Dosai /Tomato Dosa

This is a quick and easy version of instant dosa. You can make dosa immediately after grinding the batter, no fermentation required.
Ingredients 
Boiled rice / Idli rice -11/2cups
Raw rice / Basmati rice -1/2cup
Tomato -2
Red chillies-5 (adjust to your taste)
Small piece of Ginger
Few curry leaves & Cilantro
Hing/Asafoetida -1/4teaspoon
Salt

Method
Wash and soak the rices for 2-3 hours.
Grind it with tomatoes and red chilli. No need to add water, as we are adding tomatoes. If required sprinkle little water.
Add the  curry leaves -cilantro-ginger-and hing. Grind it again. Batter should be a coarse consistency, don't grind it too smooth.
Add enough salt to the batter and adjust the consistency as dosa batter. Heat a griddle and make dosa.  Spicy and delicious dosa is ready. Enjoy it with coconut chutney and kara chutney. 
I prepared tomato - egg dosa  with the same batter. Its very simple, just break an egg on the dosa and spread it uniformly on the dosa. Sprinkle some oil, flip it once its done on one side. Transfer it to the plate after 10-15seconds.Enjoy it with your choice of chutney.

Note : THIS DOSA SHOULD BE CONSUMED HOT. IT BECOMES DRY WHEN COOLS DOWN. SO PLAN ACCORDINGLY AND ENJOY! ;) :)

Recipe Inspiration : Here

Sunday, January 20, 2013

Shakarpara/ Shankarpali/ Kalakalaa

In Maharastra & Gujarat this snack is very famously known as "Shakarpara/ Shankarpali/". Recently I learnt this recipe from one of my friend's mom here. Aunty was kind enough to explain me the steps in this recipe and cleared my silly doubts very well. Thanks very much for the recipe aunty! :)

I love this snack/sweet(?!), we always used to buy it from shops. In Tamilnadu this snack is called "kalakalaa or sweet maida biscuit". Sometimes we tried making this at home, but what ever we make, will have a different taste as the store-bought one's. ;) :)

Ingredients
Milk - 1cup
Sugar-1cup
Ghee/Clarified butter -3/4cup
All purpose flour / Maida - as required
Oil-to deep fry

Method 
Measure the milk,sugar,ghee anf flour in the same / identical cups.
Mix the milk, sugar and ghee. Start adding all purpose flour little by little and keep on mixing it till the mixture forms a non-sticky mass.

After that add flour a tablespoon at a time, and knead it into a soft dough.
21/2cups to 3 cups of flour will be utilized to get the dough as in picture 5(in the above collage). Keep it aside in an airtight box for half an hour.

Make 4 equal balls out of the dough, roll it into 1/4" thick disks. Cut it into small pieces using a knife or a pizza cutter. Meanwhile, heat oil on low medium heat.
Fry the pieces, till they turn golden in colour. [Don't try to adjust the flame every now and then, keep a uniform low medium heat.]
 
Crisp and crunch Shakarpara/Shankarpali/Kalakalaa is ready. You can keep it in airtight container. It stays good for weeks in room temperature.  

Thursday, January 17, 2013

Idli Upma (version 2) & Idli podi

I have already posted a recipe for idli upma here. But this is little bit different than that one. With this I am giving a simple and tasty recipe for Idli podi/chutney powder as well.

Ingredients
Idli -4 (left over idli will be fine)
Onion(small)-1
Few curry leaves
Green Chilly -2 (adjust to your taste)
Mustard Seed-1/2teaspoon 
Urad dhal -11/2 teaspoon
gingelly  oil - 1tablespoon
Salt - 1/8teaspoon
Idli podi - 2 tablespoons

Method
Cut the idlies into small pieces (or crumble them..which ever is you are convenient with! :)) and keep it aside.
Chop the onion and green chilly into thin stripes.
Heat oil in a pan, make the tempering with mustard seeds, followed by urad dhal and curry leaves.
Add the onion-g.chilli along with little salt, fry till they become transparent.
Now add in the idli-powder and give it a quick mix. 

Add the idli pieces and toss it well.
Cook for a minute and put off the flame.
Let it be on the stove for few minutes and then serve hot. Be generous with oil and urad dhal which enhances the taste of this simple dish into a tasty meal. ;)


Idli podi / Chutney Powder
Ingredients
Channa dhal-1/4cup
Urad dhal -1/4cup
Red chilly- 10 (adjust to your spice level)
Sesame seeds -1 tablespoon
Vellam/ Jaggery/ Gudd -a small piece
Hing/Asafoetida - 1/4teaspoon
Salt
Dry roast the dhals  separately on medium heat, till a nice aroma comes.
Then roast the sesame seeds on low heat. They will start spluttering, by then remove them from the pan and keep it aside. 

Switch off the flame, and add the red chillies to the pan. They will get roasted by the heat in the pan. Take them out after a minute and add in the hing powder. 
Then remove the pan from the stove, let all the items cool down. 
Once cooled down, grind them  with enough salt to a coarse powder. Tasty and aromatic idli podi / chutney powder is ready. Mix it  with gingelly oil/coconut oil/ghee or even with any cooking oil. Tastes great with idli and dosa.

Tuesday, January 15, 2013

Corn Flakes Chivda / Corn Flakes Mixture

I tasted this chivda in a friend's house.  After coming home googled for the recipe and to my wonder most of the recipes called for deep frying the corn flakes. So called the friend's mom and Aunty told me, deep frying is not required and she told me the recipe. So, here is a quick and healthy as well as delicious version of Corn flakes chivda.

Ingredients
Corn Flakes - 3 cups [I used Kellogg's (Original) Corn Flakes]
Hand full of roasted peanuts
Roasted gram /Pottu kadalai - 1tablespoon
Few Cashews and Raisins
Few Curry Leaves
Turmeric powder -1/8teaspoon
Chilli powder- 1teaspoon(adjust to your spice level)
Fennel seeds-1/2teaspoon (optional)
Sugar-1teaspoon
Salt
Oil- 1 to 2 tablespoons

Method
Heat oil in a wide skillet, add in the fennel seeds and let them splutter.
Then add the roasted peanuts, cashews,roasted gram dal (pottu kadalai) along with the curry leaves. Fry on medium heat till the nuts turn golden in colour.
Reduce the heat to low, add in the chilli powder-turmeric powder-sugar and salt, mix it well till the raw smell from the powders are gone.
Now add the corn flakes and  toss it well, switch off the flame.
Crunchy and delicious chivda is ready to munch!

Its a guilt free snack and tastes great! You can use the frosted flakes instead of corn flakes, in that case, avoid adding sugar.

Sunday, January 13, 2013

Pongal Greetings / Sankaranthi Wishes..

Wishing a Very Happy Pongal / Sankaranthi Everyone!

Two little blogs of mine are successfully completing three years today!

Friends/Readers/Fellow Bloggers,  My Heartfelt Thanks with a sweet from my home town to all of You!... for all your support, comments and encouragements!

Wednesday, January 9, 2013

Tangy Capsicum Curry

 
Ingredients
Capsicum -2
Onion -1
Cumin seeds-1/2teaspoon
Oil
Salt
To make the spice paste
Tomato-2
Red chilly powder-1 teaspoon (adjust to your taste)
Coriander powder- 1teaspoon
Garam masala powder -1/2teaspoon
Turmeric powder- 1/4teaspoon
Dry Mango powder -1 teaspoon ( Can be replaced with lemon juice or Tamarind paste)
Sesame seeds- 1tablespoon
Sugar-1/2teaspoon
Salt
Oil

Method
Coarsely mash the sesame seeds in mortar & pestle and keep it aside.
Heat oil in a kadai, add the chopped tomatoes and cook till they become soft. Then add in the turmeric-chilli-coriander- garam masala -amchur (dry mango) powders along with the sugar,salt and sesame seeds. 
Cook for 5-6 minutes, stirring it occasionally to avoid burning. Then let it cool completely.
[I saw the recipe for this masala here and prepared the masala and stored it in Fridge.]


Now let's proceed to the capsicum curry.
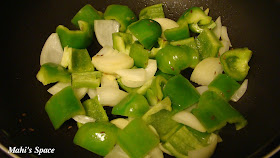
Chop the onion and capsicum into big chunks. Heat oil in a wide pan, and add the cumin seeds, let them splutter.
Then add in the onion-capsicum chunks. 


Roast them on high heat for a few minutes, then add in the spice paste.


Sprinkle 2 tablespoons of water, check the salt(remember, the spice paste has salt! :) ) and cook on medium flame.


Once the water has evaporated, the tangy capsicum masala is ready! The capsicum should be crunchy, and should not be overcooked. 


You can make the spice paste well in advance and cook this curry just under 10 minutes. It pairs well with roti's as well as rice.

Monday, January 7, 2013

Rava Kesari / Sooji ka Halwa

 Let me start this new year with a sweet recipe! :)

This is a quick and easy dessert, without any fancy ingredients.  you can fix it within half an hour. Instead of serving it in a bowl, you can cut it into squares, garnish with cashew and raisin, sure its a crowd pleaser! :)))

Ingredients
Rava/Sooji - 3/4cup
Sugar - 11/2 cups
Ghee -1/4cup
Kesari colour / food colour - few drops
Elaichi-3
Cloves(optional)-2
Few Raisins and Cashew

Method

Heat  a tablespoon of ghee in a wide pan. Fry the cloves-cashews-raisins, and keep them aside. In the same pan, add the rava and roast it till you get a nice aroma.

Powder the elaichi and keep it aside.

Meanwhile, start heating 11/2cups water in a separate burner. Once the water starts boiling, add in the food colour and mix it well.

Now reduce the heat on the roasting rava, and add the boiling water to it. (Be careful, the content will start bubbling vigorously) and mix it continuously.
Rava will absorb all the water added, mix it for a minutes and add the sugar.

Kesari will become watery once you add the sugar, keep stirring for a few minutes and start adding ghee, one tablespoon at a time. By the time you complete the 3 tablespoon of ghee, kesari would have become a non-sticky mass  and will start leaving the pan.


Add the elaichi powder and put-off the flame. [You can add the fried cashew-clove-raisin to the kesari, give it a quick mix, and done! Delicious rava kesari is ready.]

Since I was taking this to a friend's place, I poured the kesari on a greased plate, and levelled it. After a minute, marked the lines on the kesari and placed cashew & raisin on each square. Once the kesari cools down completely, you can cut it with the help of the lines marked already.

This is for our home! :)
~~~
 This dessert was liked by many of the kids at the party, and hence linking this recipe to "Healthy food for healthy Kids" happening at Nithu's Kitchen. You can check the host line up for this event here.